Shortcuts - Portal
It can be useful to create shortcuts in Simulise to, for example, your student information system (SIS), Microsoft Teams, email, timetables, or other web-based applications. Administrators can make these shortcuts available to students and/or teachers.
Creating a shortcut
- Navigate to the Administration module.
- Select shortcuts.
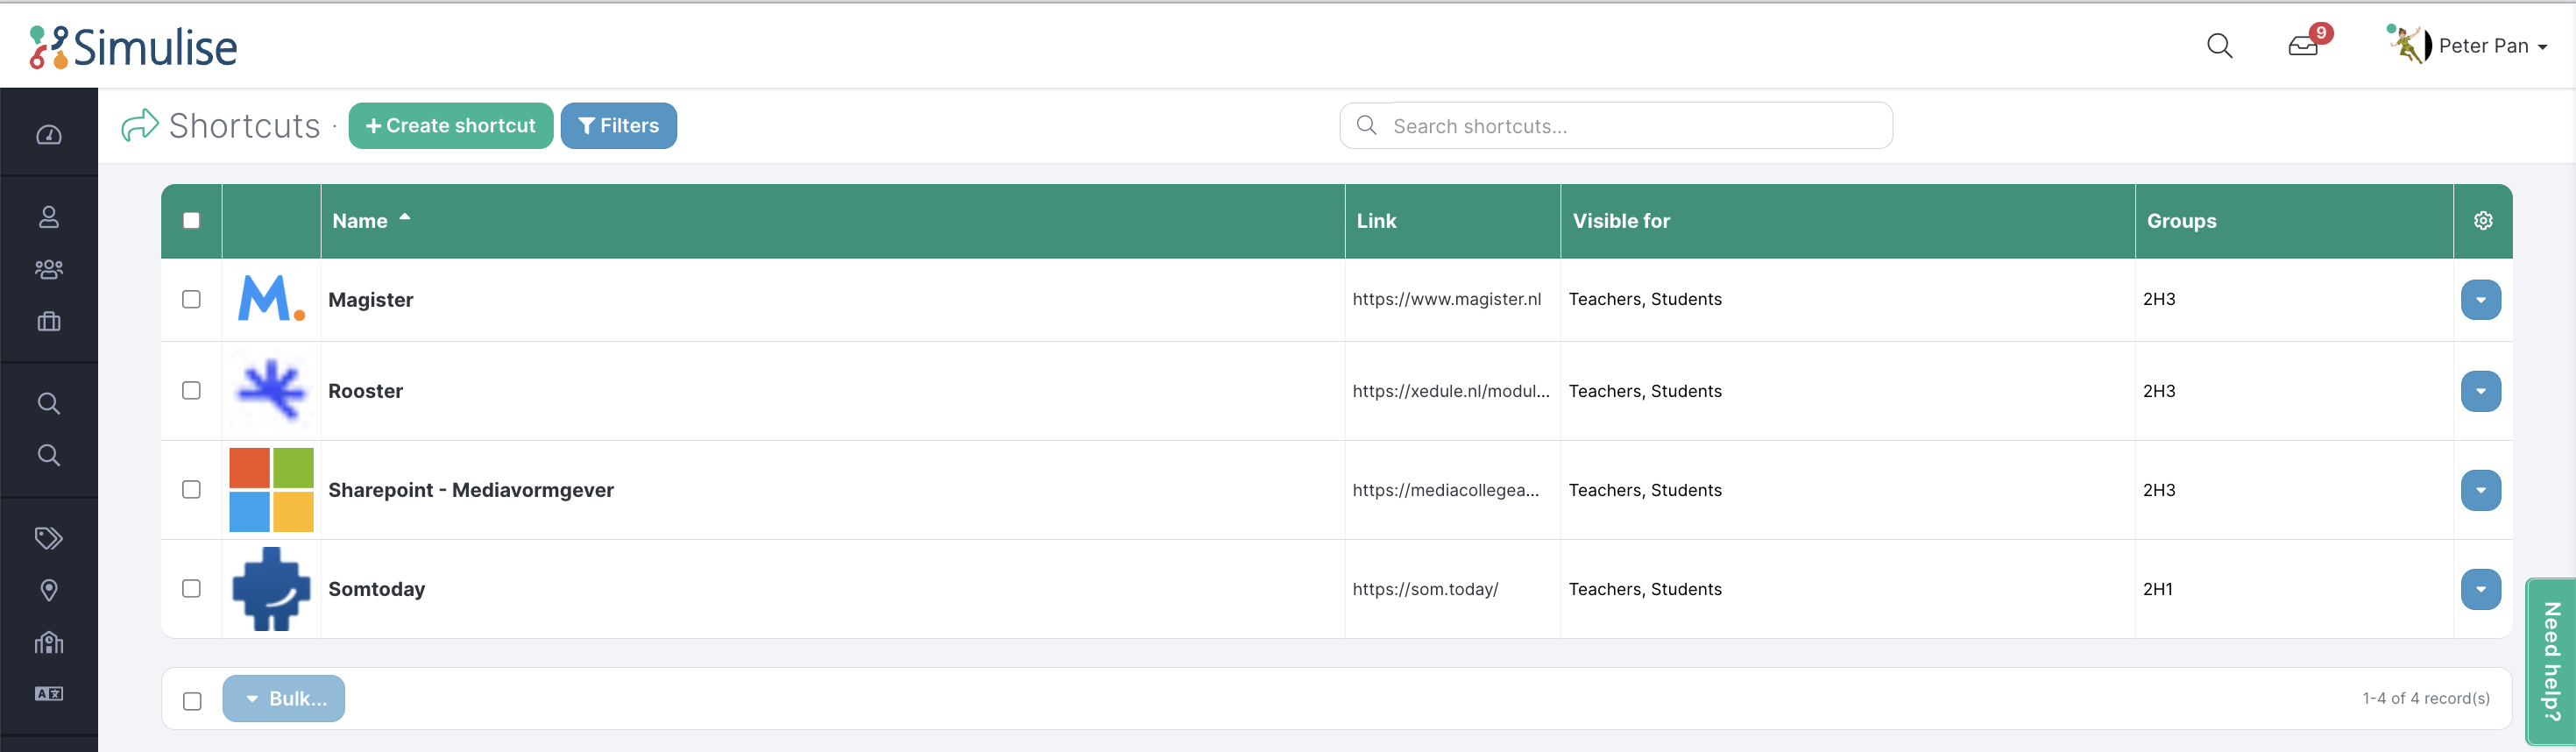
To create a shortcut, click on the + Create shortcut.
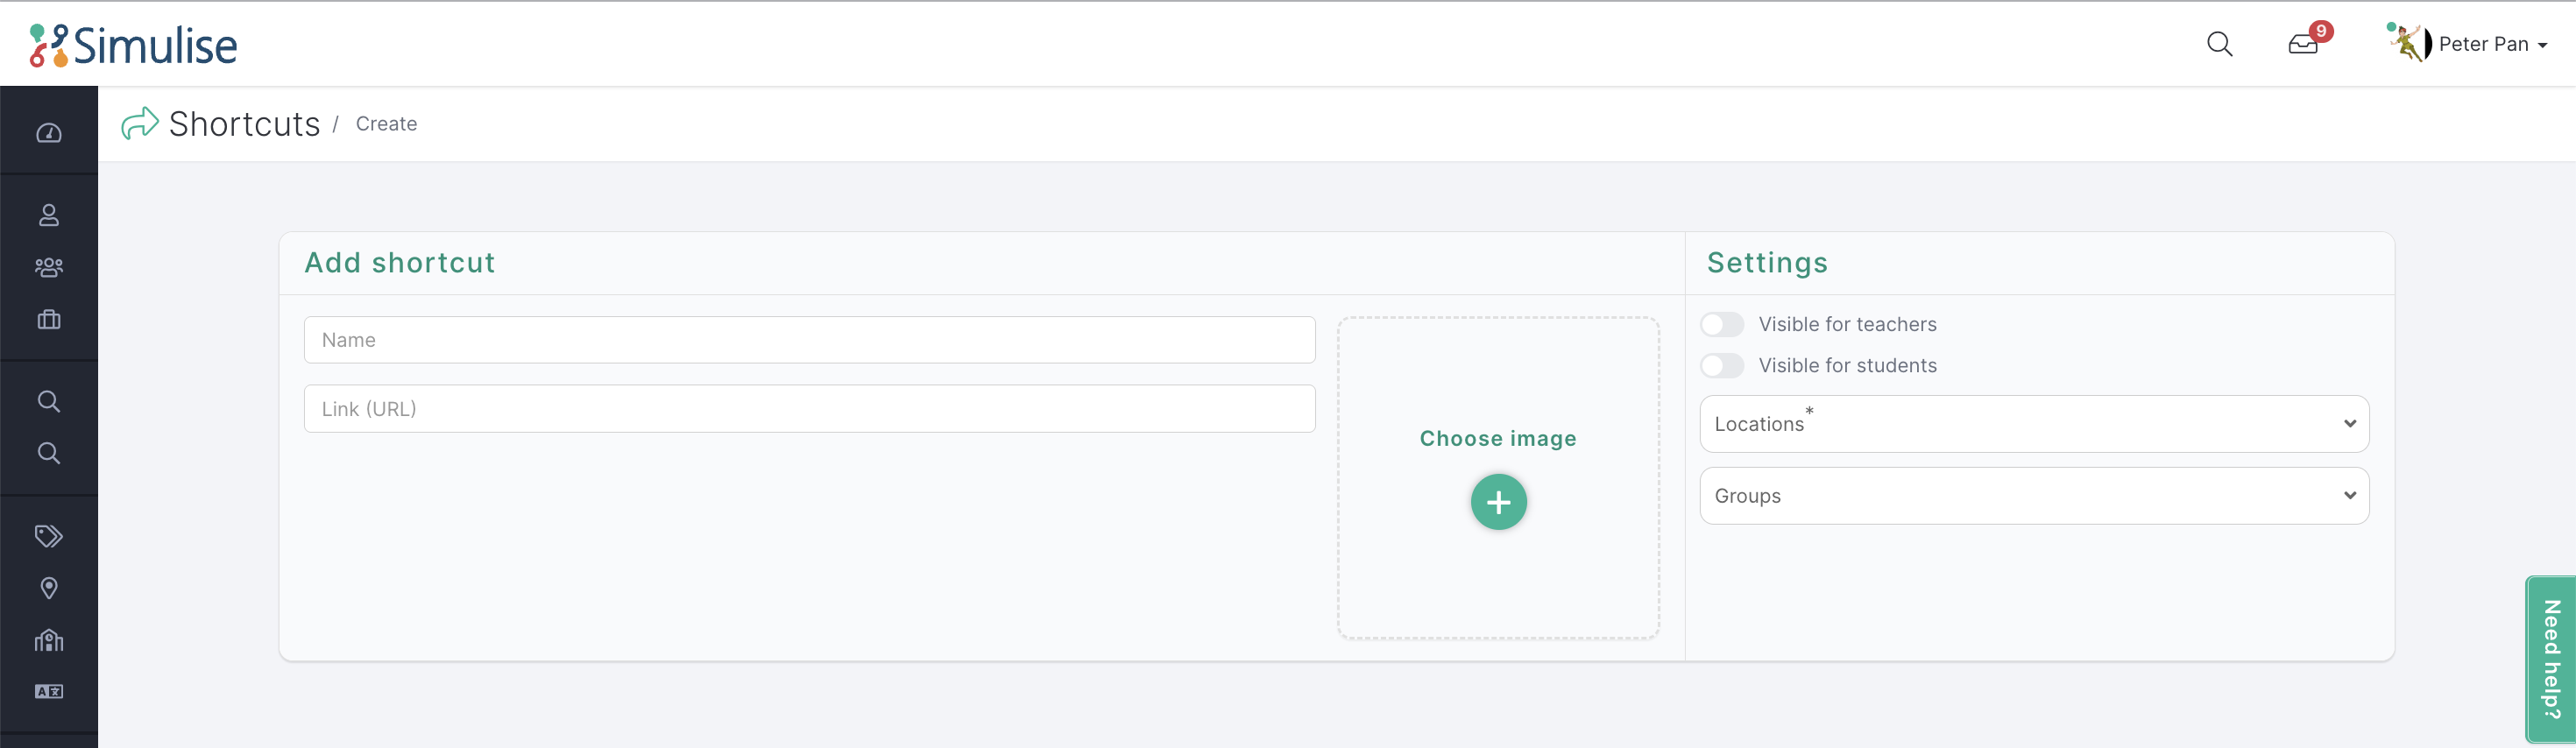
- Name: Give the shortcut a name. The name will be visible to students and teachers who receive the shortcut.
- Link (URL): Enter the URL that the shortcut should link to.
- Choose image: Adding an image is optional. By default, we use the browser icon associated with the website the link points to. You can also choose to upload your own image.
- Settings: Determine who the shortcut will be available to.
- Visible to teachers: All teachers in the selected group or location will receive the shortcut.
- Visible to students: All students in the selected group or location will receive the shortcut.
- Locations (if the module is active): Specify which location the shortcut should be available at.
- Groups: Select the specific groups that should receive the shortcut. If you do not select a group but only a location, the shortcut will be visible to everyone at that location.
- Save: Select Save to create the shortcut. After saving, the shortcut is created and immediately becomes visible to the selected users.
The shortcut on the dashboard
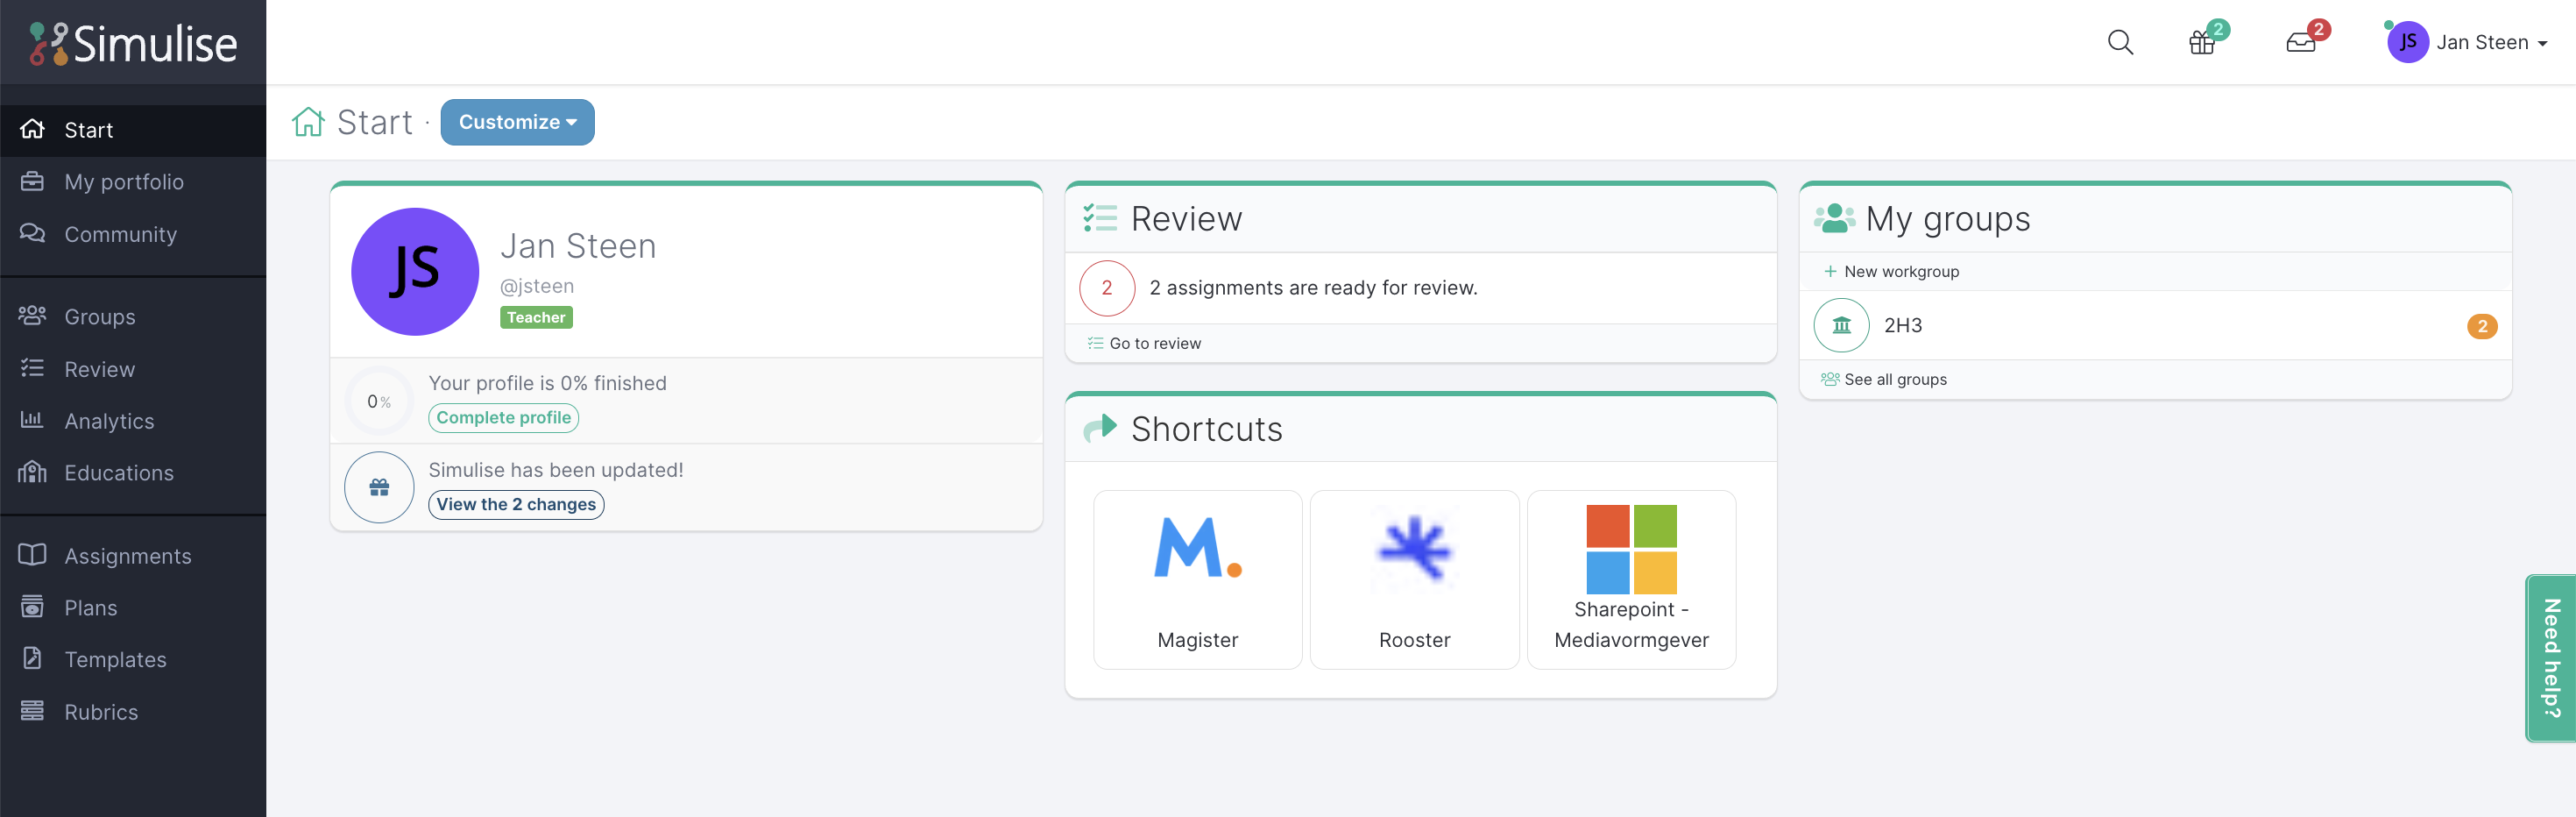
Once a shortcut has been created, it will be displayed visually on the recipient’s dashboard. The widget can contain a maximum of 12 shortcuts.